
|
|
SYSTEM SHOCK 2 WALKTHROUGH
v1.03
Introduction
This is a walkthrough for the computer game System Shock 2, produced by Looking Glass Studios (which sadly died not long after the release of this excellent game). It is not the only walkthrough, there are in fact quite a few of them on the net, but this is the only one written entirely by me. Not that this might be of any significance to you, but I had a lot of fun writing it.
General tips:
-
Always read the general tips before you read the actual walkthrough. Then, before you read the walkthrough, read the "Main goal" and "How" sections first.
-
Conserve ammo, either sneak past or bash your opponents, especially early in the game.
-
Always, always pick up any Audio logs you find. They contain clues and sometimes vital information such as passcodes. (For quick access, press "U" to hear the last log you picked up, and press Backspace to quit playing it.)
-
Check your map often. Use the minimap option to keep track of where you are.
-
Read all signs. The audio logs and emails will tell you where to go, the signs will tell you which way is what.
-
Save often.
-
Don't read any walkthroughs unless you absolutely need to, since they most certainly WILL give away secrets and ruin your game experience. (This goes for all games). When you're really really stuck, check your map, audio logs, notes. Leave the game for a while, get something else on your mind. When you've tried everything and you still are dead-stuck, think some more about what you haven't done. Then think some more. Go out into the real world, take a walk and think how much better graphics it has than any game so far. Look at a tree. Listen to some birds. Or if you live in a city, count the cars and list how many you can see of a given colour. Go down to a cafe and have a cup of coffee (or some other beverage if you don't like coffee). Listen to some music you like. Dance like an idiot in your own room. If you have a special someone, give him/her a kiss. Go see a movie (but not 'Armageddon'). Read a book. Watch the sky for at least ten minutes. Then, when you're relaxed, go back to the game and think some more of what you've missed. And check your map, audio logs and notes again. Then think some more. If you're still absolutely dead-stuck, don't say I didn't warn you. I'm warning you. This is a warning. You're about to ruin the game. Now, let the spoilers begin. This is the walkthrough.
Note: since codes are such big spoilers but no walkthrough is complete without them, I decided to put them in "spoiler boxes" like this one: 12345. Highlight the text to see it. If this for some reason doesn't work in your browser and you see the codes anyway, well, you are reading a walkthrough, don't blame me if you find spoilers.
Note 2: I don't list all available goodies, only those that I myself find useful at that point in the game. I don't see much use for the umpteenth pistol in poor condition or the eleventeenth jammed shotgun when I have an assault rifle.
Earth
Main goal: Blast off into space.
How: Join the UNN.
Goodies: Basketball, on top of the arch near the gravshafts
Detailed walkthrough (spoilers!):
I feel like an idiot actually writing a walkthrough for something as simple as the introduction, but.... there's a point to all this. Ok, here goes:
You start off inside a Tram car.
Walk forward and listen to the speaker voice. Do like the voice says, and walk straight ahead to the GravShafts (blue tube-like thingies). Step into the one on the right, with little bubbles travelling upwards. And here's the thing: once you get up, Don't walk right in to the recruitment center. Instead, walk up a bit, then turn around.
This is what you should see. You'd want to get to that red arrow. Walk up to and face the lower side of that arch-like thingy by the GravShafts. Walk right up to it and press and hold the spacebar. You should now be climbing the arch. Continue to the top, and you'll see a basketball. Center it on your screen and right-click the mouse. You should now have picked up the basketball. If you failed, move closer to it, or possibly press S to crouch down. Once you've got it, go down again and enter the recruitment center.
I won't bother describing the training areas, but I strongly advise you to take basic training as well as the three branches of advanced training, or else you'll start the game all confused.
After the advanced training, choose your career path. Marines focus mainly on weapons, Navy on tech (and some weapons), OSA on mind control. Whichever you choose, that only defines your basic skills and most immediate career path, you can always acquire any skills you want while in the actual game (if you've got the Cyber Modules for it). Go ahead, pick one.
Go back to the top of this page
Space Station
Main goal: Accumulate skills.
How: Choose career paths.
Detailed walkthrough (spoilers!):
Walk until you get to choose between three doors. Depending on your choice, you'll acquire different skills. When you see the sign for "Year 3", turn left and watch the robot dance. That's the most famous easter egg in the game. All newbies at the
TTLG forums say "omigosh, did you see that robot dance?", and all the old grumpy people say "yeah, everybody says that, learn to search the forum before you post". And now you know.
Skip to the paragraph for deck 2, since that's where you'll begin the actual game.
Go back to the top of this page
Deck 1: Engineering
Main goal: Get the elevator online.
How:
- Find override circuit board in chemical storageroom in sector A
- Insert circuit board into computer in Command Control in sector B
- Flush radiation leak in Engineering Control in sector A
- Reset both nacelles and activate core control in sector A
Chemicals needed for research on items found on this deck:
- Annelid healing gland: Os
- Psi Booster: Na, Ir
Keycard locations:
- Security access card on a dead body by the Security Station at the far end of sector A
- Cargo bay 2A/2B access card on dead body in leftmost room of Cargo Bay 1A
Keycodes:
- Storage room 4, sector A: 59004
- Engineering control, sector A: 15061
- Chemical storage room with circuit board, sector A: 34760
Goodies: hazard suit in storage room 4 in sector A, two suits of light combat armour, one in security station in sector A near bulkhead to sector B, one in cargo bay 1 in sector B. BrawnBoost implant first room in sector B. SwiftBoost implant in cargo bay 1, sector B. Surgical unit activation key in cargo bay 2, sector B. Broken laser pistol in cargo bay 2, sector B. Laser rapier in security room near the core, sector A. PsiBoost implant in sector A lower level, accessible from replicator room near the core.
Detailed walkthrough (spoilers!):
You start in a small room in sector A, near the fluidic tunnels. The ladder will take you up to MedSci again, if you wish to go there. When you go through the door you'll enter a maze of tunnels, some radioactive. Turn left and walk up to a door. Behind it is a hybrid and a dead body with 2 Cyber Modules. Past the body is the Core Access Control computer, which will tell you there's a radiation leak (which you've already noticed). Check your map and remember this place, this is where you enter the core. Now turn around and follow the left wall until you reach a small room on your left.
In this small room you'll find 2 Cyber Modules and a pistol. Continue a little bit further down the corridor until you hear Polito give you an access code, then turn around and follow the left wall in the other direction until you reach the storage room she mentioned on your left, storage room 4. Enter it (keycode 59004) and you'll find a hazard suit, which is very nice to have around here. Leave the room and continue through what little is left of the corridor, pass through a couple of doors, and enter a larger room.
There's a protocol droid and a camera in this room. Once you've disabled them, this is a very convenient "home base", since it's very quiet (nobody ever comes here), there's a QBR machine and a replicator (E1) here, and you've got access to the elevator (once it's functional again). In the center of the room is a smaller room with a monkey, a Security Control Station and 2 Cyber Modules.
In the corner near the elevator is a door. Take it and walk up to a room with a camera and a Xerxes screen. Read the floor signs: you're heading for the cargo bays and Engineering Control. In the next room is another camera, and a small lift that's offline. In the next room are two gravshafts. Go up, and you'll find a locked door by a keypad and an audio log. This is the door to Engineering Control. The log reveals the code is changed to something and that the person who changed it is in cargo bay 2. Hence, that's where we're going. Go down the gravshaft and watch out for the turret in the next room. The door by that turret leads to another room with two turrets and a camera. One strategy to handle them is to hide out behind some crates to the left, another is to run past them and take them out from behind (speed booster is helpful). It could also be a good idea to hack security, then hack the two turrets (place something in between them, like a hazard suit, so they won't destroy each other once the first turret is hacked), since there's a bit of hybrid respawning here. Once you've secured the room, search the dead body for a Security access card and enter the small room with it. Inside you'll find a Security Control Station, 2 Cyber Modules, two upgrade units (Weapons/Psi), a suit of light combat armor, an incomplete surgical unit and an Annelid healing gland (requires chemical Os to be researched). Continue to the bulkhead past the two turrets.
You are now in sector B. In the first room there's a BrawnBoost implant on the floor to your right. Walk into the next room and now
DON'T FREAK OUT when the screen fades to white and you get a little preview of things to come, it's just a passing sequence. Continue onward until you can choose between three paths (camera!), then take a right. You'll find a keycard slot for which you have no keycard. Where could one possibly find a keycard for cargo bay 2? Hmm, how about cargo bay 1? Let's find out. Turn around and run up to a similar door on the other side with fallen air ducts and a broken keycard slot. Save the game.
You'll enter a room with some protocol droid shipping boxes. Any second a protocol droid can burst out of anyone of these, so watch it. You'll hear distant sounds of a Maintenance droid to your left. Straight ahead you'll see a replicator (E2). Turn right and look for a dead body on the floor (near the text "Cargo Bay 1A" on your map). Search the body for a Cargo Bay 2A/2B access card. Now it's up to you if you want to continue to look for goodies in cargo bay 1 or just return to that keycard slot leading to cargo bay 2. If you do search cargo bay 1, this is what you'll find (at least): a medkit, nanites, ammo, 7 Cyber Modules (3+2+2), hypos, a SwiftBoost implant and a suit of light combat armor.
Back at the door to cargo bay 2, your plan is this: go to the top level of the far-end room and search a body for an audio log. Save the game and enter the cargo bay. If you decide to search the entire area of cargo bay 2, you'll at least find this: a broken replicator (E3), ammo, nanites, 4 Cyber Modules (2+2), a Surgical unit activation key, a broken laser pistol and a French-Epstein device. Once you've got that audio log revealing the keycode for engineering control, return to (you guessed it) Engineering Control in sector A.
Enter Engineering Control (keycode 15061) and use the Fluidics Control computer. It won't work - pick up the audio log for a clue. You'll need to go back to a storage room near the fluidic tunnels, where you first entered this deck. The easiest way to find the storage room is to go back to the QBR machine in the room with the elevator, then follow the right wall through the tunnel maze until you find a sitting corpse containing 2 Cyber Modules. Remember to wear that hazard suit you found earlier.
Enter the storage room (keycode 34760) and notice that it's in fact a chemical storage. How nice. Pick up the circuit board named #45M/dEX and go back to sector B; the Command Control is located between cargo bays 1 and 2, i.e. straight ahead from the bulkhead. Now, once you approach said area you'll notice a few barrels of explosive material. This is very convenient. If you open the door and blast a barrel you can almost destroy the turret inside, but watch out so you don't kill yourself as well. Enter the room and notice it's a shuttle bay. To the left is a recharging station. There are gravshafts leading up to a lift taking you to Command Control.
In Command Control you'll find a Systems Monitoring unit, ready to receive the circuit board. To the left is a camera and a QBR machine, to the right two upgrade units (Stats/Tech). Insert the ciruit board and return to Engineering Control.
Back at Engineering Control, use the Fluidics Control computer again. Good, now the fluidic tunnels are clear of all radiation. This is particularly good since you'll be heading that way once again, on your way to the core. Remember where the core was? You couldn't enter it because of the radiation leak. It's located past the ladder up to MedSci. Go to the core.
This time the door to the core will open. Past it, press a button to open a hatch and climb up the ladder to a room with a small lift (offline) and a replicator (E4). Go through the door. Immediately to your right is a lift to Core Control. Don't go there just yet, you have to reset the nacelles first. There's one on the right (STBD on the map) and one on the left (PORT). In the one on the right you can find 2 Cyber Modules and a Psi Booster (requires chemicals Na, Ir to be researched). Between the two nacelles, on the opposite side of the entrance to the core, is a small room with a laser rapier. Once you've activated both nacelles, go up with the lift to Core Control and switch on the main power. You should get a message from Polito saying the elevator is online. Go down with the lift and back to the room with the replicator. Now, if you want to, you can go down with the small lift to an area with some goodies (PsiBoost implant, 2 Cyber Modules) and a MidWife. Otherwise, just go directly to the elevator. You can't take it to deck 4 like Polito said, but you can go to deck 3...
Go back to the top of this page
Deck 2: MedSci
Main goal: Find the keycode to the maintenance shaft.
How:
- Recharge dead power cell to gain access to Medical sector
- Find crew access card in medical subsection
- Find R&D access card in Dr. Watts' room in crew subsection
- Find Watts in R&D subsection of Science sector
Chemicals needed for research on items found on this deck:
Keycard locations:
- Cryogenics sector access card in the very beginning of the game
- Science sector access card on the floor in the leftmost room in cryo
- Crew access card on dead body, in the lower level of a room at the lower left of the Medical sector
- R&D access card in Dr. Watt's office, at the far right end of the crew section of the Medical sector
Keycodes:
- Door in cryo area: 45100
- Closet near upgrade units in cryo area: 00000
- Armoury in Medical sector: 98383
- Maintenance shaft in Science sector: 12451
Goodies: Two wrenches early in the game, in cryo section of Science sector. Two BrawnBoost implants, one in a locked closet in cryo area in Science sector, one in restroom in crew subsection of Medical sector. PsiAmp near upgrade units in cryo area, Science sector. Dead power cell near bulkhead door in Science sector leading to Medical sector. Three pistols, one near replicator in room with Xerxes screen, one in chemstorage room near elevator, Science sector, one in Medical sector. Two suits of light combat armor, one in medical subsection and one in crew subsection of the Medical sector. Broken grenade launcher behind bar counter in crew subsection of Medical sector. Two shotguns, one in "hidden" room opposite Watts' room in crew subsection in Medical sector, one in R&D subsection of Science sector. (Assault rifle, an EMP rifle, a Stasis Field generator and a standard-issue combat armor available if "cheating" and entering armoury in Medical sector.)
Detailed walkthrough (spoilers!):
This also seems a bit stupid to describe, since Polito will guide you through the first part anyway. (*sigh*) Here goes: You'll see a ladder on your right, obscured by a fallen air duct. To your left is a dead body with a Very Solid Wrench. Pick up the wrench, it's your first weapon. Press 1 to ready the wrench, left-click to swing it. Smash the fallen air duct and climb the ladder.
Turn right, then press the button on the left by the door, and enter the room. You'll find a Cryogenics Sector access card on the floor. Pick it up and use it in the card slot by the next door.
Next, a door with a keypad lock. If you had some nanites you could possibly hack it, but you don't. Look around. On a dead body you'll find an Audio log explaining the code (it's 45100, which is a reference to the first passcode in System Shock 1; a number initially inspired by Ray Bradbury). Enter the code and walk into the next room.
Face the window on your right and watch the scene, then turn around and crouch down (press S) and walk into that narrow passage. You'll end up in a room with a large door and a recharging station. Pick up the dead power cell, use the recharger and place the charged power cell in the receptor by the door, and the door will open.
This is where I'd say the game actually starts, although you may disagree. Press M to check your map. Click the box where it says "Minimap", then TAB to return to normal mode. You've now enabled a small map in your upper right corner, which is very handy to keep track of where you are. In the next room you'll find four upgrade units, like Polito said, where you can improve your skills if you have enough Cyber Modules. Look around the rooms and pick up whatever stuff you find. In one of the rooms, the one where the door doesn't work, you'll find a keypad by a closet (keycode 00000), where you'll find a BrawnBoost implant which will come in handy when whacking foes with your trusty wrench, as well as a few speed boosters. You might want to drop off that basketball you picked up on Earth, since you won't be needing it for a while and you'll probably need all the inventory space you have. This is a pretty good place to drop it off, since you'll most likely return to this room quite a few times.
On the upper level you'll find a PsiAmp in one of the rooms, but you can't use it unless you've got some Psi skills. Even if you're not OSA, it might be useful to obtain some Psi skills (I won't tell you which right now, you'll eventually figure that out anyway). There's a door that requires a keycard. Conveniently, you'll find a Science Sector access card in a nearby room. Save the game before you go through the keycard door.
Once you open the door, prepare to be greeted by a couple of hybrids (they might contain some nanites, or possibly a hybrid organ which you can research to learn how to target them better). To the left is a room with a Security Control Station, which you can hack to shutdown level security (cameras/turrets) for a little while if you've got any hacking skills. There's also a security crate in this room, which you also can hack. To the right is the elevator, but it won't work right now because it has no power. Opposite the elevator is a maintenance shaft, which you'll need to get into since the elevator won't work. Turn left and walk down the corridor a bit, past the security station. Turn left, but watch out for the camera.
Pick up the dead power cell by the body. You'll need to recharge that somewhere. Turn around and walk back a bit, then left at the door. Inside you'll find a hybrid and a Quantum Bio-Reconstruction Machine (QBR), which will be able to resurrect you if you die, once it's enabled. Enable it by using the handprint nearby. (Note: I personally detest the idea of resurrection in games unless the game for some stupid reason is designed so it can't be avoided. However, most people seem to use them, so I'd advise you to enable all QBR:s you find.) In the nearby room, a room for cremating the dead, you can find a couple of hypos. Leave the room and turn left.
You'll enter a room with a Xerxes screen in the center and the words "Remember Citadel" written on a wall (Citadel Station was of course the setting for System Shock 1). There's also a Replicator (M1) in the room. A replicator is a nice little machine that can sell you useful stuff in exchange for nanites. If you don't like the prices and/or items being sold, you can hack it if you've got the skills. Next to the replicator is a dead body with a pistol, your first projectile weapon. Remember, ammo is scarce, so conserve as much ammo as you can by using the wrench instead. With your back to the replicator, on your left is a room with a camera and a turret, and straight ahead (behind the Xerxes screen) is an exit that leads to the elevator. Take that exit and turn left, past another door.
Now, if you turn left again, you'll find a chemical storeroom, in which you can find a bunch of chemicals you might need to research items you'll find. There's usually one chemstorage on every deck. Inside this room you'll also find another pistol, which could be handy to pick up since weapons degrade when you use them, and you're not likely to have any great maintenance skills just yet. Leave the room and turn left.
Behind a hybrid whacking someone to death you'll find a ladder leading down to a recharging station, which is just what you're looking for. It's very convenient. Maybe a little too convenient... It's a trap. Once you get down there, two turrets will fire at you. If you can hack security, do so before you enter the room. Otherwise, watch out. If you destroy the turrets it's a good idea to search them for ammo. There are 2 Cyber Modules on the body on the floor. Use the recharging station to recharge the power cell, then climb up the ladder again and walk past the chemstorage.
To your left is a camera, so watch out. Run towards it, then left into a room with a hybrid and a monkey. You might think monkeys aren't very threatening, but the monkeys on the Von Braun are not your average monkeys, so be careful. If you kill the monkey you might find a monkey brain on it (requires chemical Fm to be researched). Leave the room and turn left. On your right is an unbreakable window. You were on the other side of this window earlier and watched a hybrid shoot a woman. Ergo: hybrids have shotguns. Keep this in mind, and continue forward through the corridor.
There's a room on your left, and past that the corridor makes a left turn. Straight ahead is a ladder leading down to a hybrid. Through the window near this hybrid you can see Dr. Watts, which is just the man you're looking for. The sign on the wall near where you stand says "Research & Development", and an arrow pointing to a door. This door requires a keycard you don't have yet. There's also a replicator (M2) by this door. Turn around and go back the way you came, and continue to where you found the dead power cell. Since the power cell is now recharged, put it in the receptor and the door will open. Walk through it and use the bulkhead activation switch.
You are now in the Medical sector. To your right is a door which requires a keycard you don't have (Deck 2 Crew access card). Straight ahead is an area where you can pick up 2 Cyber Modules and some goodies, if you're up to facing a hybrid, a couple of monkeys and, depending on your selected path, possibly a turret. Go left.
On your right is a room with a QBR machine and a surgical unit. Surgical units can heal you for a cost of some nanites, but usually you'll only find incomplete surgical units, which can be activated with surgical unit keys. One such key can be found in the area I mentioned above, with the monkeys, but you don't need a key to activate this particular surgical unit since it already has a key. Go out into the corridor. On your left is a room with a hybrid, and straight ahead is a camera to watch out for. Turn left by the camera. Now, on your right is a radioactive room with some goodies. Since you don't have a hazard suit, you'll need to be quick if you do decide to go in, and anti-radiation hypos would also help.
Continue forward, and two hybrids waving shotguns will come running from around the corner. They're not very friendly. If you manage to kill them, you'll notice you can pick up their shotguns, but not use them since they're broken. If you've got some repair skills you can fix them, otherwise just unload the ammo from them and throw them away (right-click on shotgun, click Unload). Turn right, then enter the room on your right. On the body inside you'll find a suit of light combat armor, which is a lot better than the armor you're currently wearing (which is nothing). Continue through the corridor and watch out for the turret. To the right of the turret is a door to a room with camera and a ladder, leading both up and down. Climb up to find a hackable crate with a pistol, climb down to find a Deck 2 Crew's Quarters access card. Climb up again and go through the other door. Break the glass and jump through.
There's another radiation room here, with 2 Cyber Modules and some goodies inside. The decontamination shower will remove any radioactive material once you're out again. Continue through the corridor; there's a room on the right, then a U-turn and you're back near the first radioactive room. Take a left and continue towards the locked door by the bulkhead.
You'll enter a corridor with some rooms. The one on your right has a replicator (M4), and there's a broken grenade launcher behind the counter. The other rooms have some minor goodies. Go through the door at the end of the corridor.
There's a Security Control Station in a room on your right. There's also a keypad in this room which opens the door to the armoury, but you don't get the access code to this room until much later in the game (keycode 98383, inside you'll find an Assault rifle, an EMP rifle, a Stasis Field generator and a standard-issue combat armor). Near the security room is an OS upgrade unit which will offer you a range of rather specific upgrades. There are only four such machines in the entire game. On your left is a lounge with four regular upgrade machines, two on the bottom floor (Psi/Stats) and two on the top floor (Weapons/Tech). There's also a replicator (M3) on the top floor. Just near the OS upgrade machine, there's a bulkhead door leading back to the science sector, where you started. Continue forward.
You'll see a ramp leading down. There are some crew rooms on the right (containing a suit of light combat armor) on the upper level, and some on the left (containing a BrawnBoost implant) on the lower level. Dr. Watts' room is in the end of this corridor. Watch out for the camera halfway through the corridor. In Watts' office you'll find a Research & Development access card. Opposite his office is a light switch on the wall. Use it and enter the room. Climb the ladder and jump to a hidden section with a shotgun and 4 Cyber Modules. Return to the bulkhead and go back to the science sector.
Go to the locked door by the replicator, near where you could see Watts through a window. Open the door and enter a corridor, watch out for the camera. Turn right at the end of the corridor and enter another corridor. The room on the right contains a recharging station and some goodies. Then, as the corridor turns right, there's another entrance to a ledge overlooking the last room, with a shotgun on the ledge. Around the next corner to the right is a camera and a door on the left, leading to Watts. Go down the lift. Search the body in the corner for a pistol, then walk to the far end of the room and meet Watts. Get a couple of logs from him, then watch out for two hybrids storming in. Return to the maintenance shaft by the elevator, now that you've got the keycode.
The Maintenance droid has left the maintenance room, so watch out. Enter the maintenance room (keycode 12451) and get some cyber modules, along with a message from Polito. Ignore her for a little while, pat yourself on the back and go to the upgrade units to use up your cyber modules before you climb down the ladder. Jump to the section for Deck 1: Engineering.
Go back to the top of this page
Deck 3: Hydroponics
Main goal: Clear the elevator shaft from biological infestation
How: Insert vials of a specific biotoxin, Toxin-A, into the four Environmental Regulators.
Chemicals needed for research on items found on this deck:
- Toxin-A: 2xSb, V
- Grub pod organ: Cf, Ga
- Annelid psi organ: Y, Ga
- Arachnid organ: Ir
Keycard locations:
- Hydroponics Sector A access card on a dead body near environmental relugator ACR2
- Hydroponics Sector B access card on a dead body in sector B, halfway to the chemstorage near the monkeys
- Hydroponics Sector D access card on a dead body in a corridor in sector A
Vial locations:
- Two vials in biological survey room, near the recharger room in C sector
- One vial in office next to the chemical storeroom in sector B
- One vial in an office in the long corridor to the left of the elevator in sector C
- One vial in the room after the bulkhead door in sector A
Environmental Regulator locations: one in each sector.
Goodies: 2 Auto-repair units, 1 by environmental regulator (ACR3) and 1 in a hackable crate early in sector A. Assault rifle in sector A, symmetrical corridors room. LabAssistant implant in science room in sector C. 2 SwiftBoost implants, one in sector C though the window from the room near environmental regulator, and one in sector A in the first room. PsiBoost implant in sector C, near entrance to sector A. Sector A access card and ICE-pick in sector B, by environmental regulator (ACR2). Grenade launcher in sector B, near the door to sector C. Sector B access card in sector B, long room with some monkeys. Laser pistol in sector B, near the monkey room. Laser rapier in sector B, near chemical storeroom. Hazard suit, sector A storeroom. Sector D access card in sector A, symmetrical corridors room. EndurBoost implant in sector D, first room. French-Epstein device in sector D, hackable crate. EMP rifle and power armor in sector D, control room.
Detailed walkthrough (spoilers!):
The elevator in is the C sector (map), which is where you start out. Leave the elevator, turn right. Past the small corridor is a control room with two upgrade stations (Psi/Tech), an OS upgrade unit and a recharger. Beware of the trap! There are two turrets and a camera behind the glass, just avoid them by running past the window to the door in the opposite end of the room. New corridor: to the right is the entrance to the turret room you ran past. Be prepared for action if you want to enter it. Inside you'll find three annelid eggs, which burst open if you come too close, releasing some nasty worms. Inside the eggs you might find some goodies (an Annelid healing gland, needs chemical Os to be researched, or an Annelid psi organ, needs Y and Ga to be researched). Destroyed eggs will leave a Grub Pod Organ, which you can research (chemicals needed: Cf, Ga).
Go back the way you came, to the corridor. On the right there are three doors and on the left there are two. In the rooms to the right there are some goodies and logs. The first door on the left is broken, so never mind that. The room is accessible via the second on the left, where there is a broken replicator
H5)
with sparks flying (beware!). Break the glass and jump into the room with the broken door. There you'll find two vials of Toxin-A and a LabAssistant Implant. You'll need to research the biotoxin before you can use it (chemicals needed: 2xSb, V). Jump back into the replicator room and go out in the corridor, turn the corner to the left. Advance slowly, you're about to run into a MidWife cyborg. Kill her (she might contain a MidWife Organ, chemicals needed to research: none, or a Psi Booster, chemicals needed: Ir, Na) and turn left where she appeared, which should be near the door to the D sector. You can't get into the D sector right now, so just turn left.
Run down to the door, pick up the goodies on the floor. After the door is another room with a dead body and some pipes. Straight ahead is a replicator (H1), to the left is a room with a ladder and some doors. Climb the ladder, enable the QBR machine on the right then enter trough the door on the left of the ladder. Careful, there's a camera around the corner. In that room there are two desks, some plantbeds on the right, a window on the left (more about this window later) and straight ahead there's a ramp down to the first Environmental Regulator (actually labeled ACR3), guarded by a MidWife cyborg. There are also a few more annelid eggs in the regulator room, as well as an Auto-Repair unit hidden in the shadows. Insert a Toxin-A vial (it won't work if you haven't researched the toxin) into the regulator (drag'n'drop from your inventory) and cash in some Cyber Modules.
Go back up into the room you came from. Now, you might want to climb through that window I mentioned earlier, there's a dead body with a SwiftBoost implant in that room. However, watch out for the cracked glass - you might not want to drop down to all those annelid eggs right now, you can reach that area later on. In the south end of the room, there's a hidden space you can crawl through to find a maintenance tool and some nanites. Go back to the ladder room and climb down again. Choose the door on the right (the one straight ahead from the ladder is where you came from). After a short corridor you enter a Xerxes room, much like the one on Engineering. There's a camera in that room so watch out. Past Xerxes there's an inaccessible door to the B sector and another door, which is where you want to go. Sneak slowly up the ramp, there's a camera in the next room. In that room there's a dead body with a PsiBoost implant a ramp down to the left (which brings you back to the elevator if you take another left) a few windows on the right and an inaccessible door to the A sector. Smash a window on the right and drop down to a room with a few boxes.
You are now in sector B. There are some Cyber Modules on the boxes. Take out a few hybrids, the keep to the left in a U-shaped path until you're near a floor sign that says "DO NOT BLOCK" and a hole in the floor with an annelid egg below. Destroy the egg and drop down through the hole, but watch out for the MidWife and a hybrid. Down there you'll find a bunch of eggs (move carefully!) in a cold storage room. Explore the adjacent rooms and you'll find Environmental Regulator 2 (labeled ACR2) and the following goodies: the important Hydroponics Sector A access card, an ICE-pick, 3 Cyber Modules + some ammo and nanites. Climb up the ladder and keep to the left until you reach a door. Then, to the left is a corridor with a bunch of monkeys and straight ahead is an inaccessible door to the C sector. There's a grenade launcher by this door. Go to the monkey corridor.
The monkey corridor is really a long room with two sets of stairs to the right. Down the first you'll find 3 Cyber Modules and by the second a security camera and an uninteresting door. Don't bother with the water. Instead, search the body by the second set of stairs, and pick up the important Hydroponics Sector B access card. You can turn back to the door by the grenade launcher now if you want, although I'd advise against it. Some neat but unimportant stuff is coming up. If you do decide to go back, skip this next paragraph.
If you choose to continue you'll come to a new corridor, where you can turn left or right. If you turn right you'll come to an area with lots of eggs, a few MidWives and a laser pistol. This is the area I mentioned above, just below from where you found the SwiftBoost implant, near the first regulator room (you might fall down into the egg room if you step on the cracked glass). If you go left, turn left again and run past the door on your right. You'll end up in a small room with some ammo, hypos, two incomplete surgical units and a laser rapier (and a little story element). Turn around and enter the door you ran past. Careful, there's a MidWife just waiting to sneak up on you. Turn left and enter the Chemical Storeroom, then left again quickly and take out the MidWife before she tears out your spine. In this room you'll find another vial of Toxin-A. Back out in the chemroom and pick up the medkit on the shelf and the 3 Cyber Modules in the trashcan. Leave the room and turn left. On your right is a room with a camera and a small water pool, with an anti-toxin hypo on the bottom. Go back to the door by the grenade launcher.
Go through the door and you'll be back in the Xerxes room. Make a U-turn and up the ramp again, and enter the door to Sector A. Watch out for the security camera. Just before the bulkhead to Sector A there's a broken replicator (H2). Enter the bulkhead.
You're now in sector A (map). In the first room, there are a couple of eggs on each side of the entrance, and a camera, so watch out. In the room there's a replicator (H3), a body with a SwiftBoost implant and another with a Toxin-A vial, a recharge station and two upgrade units (Stats/Weapons). Above the weapons upgrade unit is a removed tile, which houses 3 Cyber Modules (jump to see them). The door on the left leads to a corridor; keep to the right and enter the store room. There's a hazard suit in a crate, and some anti-personnell ammo in the hackable crate on top of it. Pick up the 3 Cyber Modules "hidden" in a corner behind some boxes. Go back out in the corridor.
In one end there's a hackable crate with an Auto-repair unit. The two doors (one in each end of the corridor) leads to a joined symmetrical area, so it doesn't really matter which one you choose. What does matter, however, is that both sections of that area contains a large hostile Maintenance Droid and a security camera, so stay alert. In the right section there's a dead body with the important Hydroponics Sector D access card, some ammo and the all-powerful assault rifle (the first one you encounter in the game). Beyond this area is another corridor with one exit. Following that are two sets of symmetrical double rooms (a total of four rooms) with flowerbeds, ladders and annelid eggs. There is also another Maintenance Droid and some goodies (like 3 Cyber Modules, nanites, hypos etc.) there. After this section comes the regulator room, which contains a stationary MidWife and a patrolling Maintenance Droid, some more eggs, a camera and the third Environmental Regulator (labeled ACR1). Beyond that is a pretty but uninteresting room with a pool and a nice view. Go back the way you came to the bulkhead, then to the door back to the C sector, then turn right and go down the ramp to a corridor.
Now, if you've followed the above path you should have one vial of Toxin-A left, and you can safely skip to the next paragraph. If you don't, there's no need to worry. You'll now find yourself in a corridor. To the left is the elevator where you came in earlier, to the right there are two offices, a few hybrids and a MidWife. In the first office there's the last vial of Toxin-A, and in the second office a log and some shotgun ammo.
Continue towards the elevator (left), then trace your earlier steps through the recharger room, the corridor and to the point where you met the first MidWife, i.e. by the D sector door. Go through the door and then the following bulkhead door.
You're now in sector D (map).
You enter a long hallway with a few eggs. Destroy one egg, and a MidWife comes out. Kill her and walk in, clean out the eggs. There's a dead body with an EndurBoost implant. Ignore the door on your left for now and go to the second room, with the replicator (H4). To the right is a small room with a hackable crate that contains a French-Epstein device, and 3 Cyber Modules are "hidden" in a corner. Straight ahead is some sort of control room, with an EMP rifle (broken) on the desk and a dead body with a power armour and some goodies. For some bonus goodies, break the right window and jump out on the ledge. Make your way around the room, go up the ladder, jump up on the pipes and then around the room again, and you'll find a hidden compartment with 3 Cyber Modules and some ammo. Jump back through the broken window (this might be a bit bothersome, so save and retry when you fall down in the boiling water; I found it's easier to break the middle window, crouch and simply walk off the center pipe rather than to jump, but you may need some AGI for that).
Go back to the door you ignored a little while ago, and be prepared to kill a MidWife, 3 baby spiders and a few eggs. On the spider corpses you might find an Annelid Arachnid Organ, which you can research with the Ir chemical. Down the ramp and to your right is a room with 3 Cyber Modules and some ammo, and to the left is the last Environmental Regulator (labeled ACR4).
Having done all this, you're done with Hydroponics and will never have to return (unless you left something important behind, like the assault rifle). Make your way back to the elevator and go to deck 4 to meet Dr. Janice Polito.
Go back to the top of this page
Deck 4: Operations
Main goals:
- Meet with Dr. Janice Polito
- Reprogram the 3 Simulation Units
How:
- Kill the 3 red assassin cyborgs and take one simulation chip from each
- Insert simulation chips into corresponding simulation units
Red assassin cyborg locations:
- One in sector C in the Data Storage room, carries the Interpolated Simulation chip
- One in sector B just behind the only non-bulkhead door from the Xerxes room, carries the Quantum Simulation chip
- One in sector D near command center past the D-shaped room, carries the Linear Simulation chip
Simulation unit locations:
- Quantum Simulation unit in a small office in the far end of sector C
- Linear Simulation unit in a small room past "BRIG" in sector D
- Interpolar Simulation unit in the lower level of Power Ops in sector D
Chemicals needed for research on items found on this deck:
- WormMind implant: Cs
- WormBlood implant: Cu
- Crystal Shard: Y
Keycodes: armoury in sector D: 13433.
Goodies: EMP rifle in sector C, Data Storage room. WormMind implant in sector C, Data Storage room. 2 Crystal Shards, one in the sector C upgrade room and one in sector C near the Quantum Simulation unit. ICE-pick in sector C, room near radiation leak. 2 Laser pistols, one in sector C right lounge, one in sector D by the Linear Simulation unit. EndurBoost implant in sector B, far end near chemical storage room. 2 French-Epstein devices, one in a sector B crew room, one in sector D by the Interpolar Simulation unit. SwiftBoost implant in sector B, crew room. Standard-issue combat armor in sector B, crew room. 2 Auto-repair devices, one in a sector B crew room, one in sector D in a small room near the bulkhead. Assault rifle in sector D, armoury near QBR machine. WormBlood implant in sector D, prison cell. BrawnBoost implant in sector D, crew quarters. Stasis Field Generator in sector D, up a ladder in a small room near the bulkhead. ExperTech implant in sector D, near Interpolar Simulation unit. Laser rapier in sector D, by Interpolar Simulation unit.
Detailed walkthrough (spoilers!):
You enter the Operations deck in sector B. In the first room is Xerxes screen, a QBR machine and a few doors. Go directly to the one on your right (bulkhead 41), all the others are locked for now. This door leads to Polito's office in sector A. Meet with her and go back the way you came, to sector B. Now, the other doors can be traversed in any given order, but I suggest going counter-clockwise from where you stand, i.e. go to the next door on your right (bulkhead 42). That way you save the hardest part for last.
You've now entered sector C. The first thing you see is a destroyed turred and a dead body. Turn right at the "DATA STORAGE" sign and watch out for the camera behind the steam. Enter the big room and quickly run to the right and hide behind the crates. Exploading barrels will drop down from a platform above, so sit there until they stop falling. Once they've stopped, explore the room and you should find the dead body of your first red assassin cyborg (killed by the exploading barrels!), with the important Interpolated Simulation chip (the first of three). You'll also find an EMP rifle, a WormMind implant (requires Research skill 3 and the chemical Cs) and a medkit. Go back out from where you came and enter the door straight ahead by the ammo boxes. In this room you'll find a Crystal Shard (requires Research skill 3 and the chemical Y) and two upgrade units (Tech/Stats), along with 2 Cyber Modules and a maintenance tool by the couches. Go up the gravshafts and watch out for the worms. In this room there are two more upgrade units (Weapons/Psi). Go down the gravshafts again and exit the room, and turn left out in the corridor.
Around the corner you'll find a QBR machine. Enable it and move along. You'll come to an area with a recharger and a radiation leak. Even if you have a hazard suit, go right and up the ramp to clean out some hybrids. When you're out on the other side of the radiation leak, turn left towards it and enter the room on your left to pick up 3 Cyber Modules, some ammo and an ICE-pick. Leave the room and continue through the corridor. Ignore the body hanging from the ceiling for now, and turn right to face a replicator (O1). There are two doors by the replicator, choose the one on the left and enter a lounge.
Immediately to your left is another replicator (O2). Prepare for battle, walk down the ramp and wait for the ghostly scene to play out. Once you've disposed of the Maintenance droid that appears, go through the door on the left wall of the room and then turn right into the kitchen. There's a small room in the back with 3 Cyber Modules. Continue throught the corridor past the kitchen door into a cold storage room. This is where you'll first encounter an annelid swarm, and after you destroy the egg you can find a Swarm Pod Organ that you can research (no chemicals needed). Go back out into the lounge area. There's a Security Control Station there that you can hack if you've got the skills, and it's advisible to do so if you wish to go to the next lounge section.
In the other lounge section there are two turrets and a camera. There's a laser pistol on a dead body there, and a door to the restrooms. Explore the restrooms if you wish for some goodies, then leave the lounge and go back out to the dead body hanging from the ceiling near the replicator. There are 3 Cyber Modules in the body (worm alert). Past the body is a bulkhead door on your left, ignore that for now. Instead, walk up to the large room with smaller adjacent rooms. One of these rooms contain a simulation unit, the Quantum Simulation unit (labeled 1), the other rooms some goodies (including a second crystal shard). You'll need the Quantum Simulation chip to reprogram this unit, but so far you've only got the Interpolated Simulation chip. Remember where this room is located, you'll need to return here once you've found the correct chip. Go to the bulkhead you passed by a little while ago and enter sector B.
You're now back in the B sector, but in the far end, so to speak. Straight ahead of you is a hackable crate with a EndurBoost implant, and to your left is a chemical storeroom. Past the chemstorage is an open room with a gravshaft leading down to smaller rooms containing various little traps and goodies (6 Cyber Modules, ammo, nanites, hypos, a French-Epstein device, a SwiftBoost implant and a medkit). Following that a short corridor with a dead body by a broken replicator (O3). By the end of the short corridor are gravshafts to another set of smaller rooms with traps and goodies (ammo, nanites, hypos, standard-issue combat armor, an Auto-repair unit, 3 Cyber Modules). Then, another pair of gravshafts, but this time leading up to a small lounge with four upgrade units (Stats/Weapons/Tech/Psi) and a recharger station. There are 3 Cyber Modules on a dead body. Go down again and continue past the dead body by the shotgun.
When the door opens you might see another red assassin cyborg. If you see him and can't kill him, or you don't see him at all, don't worry, you're cornering him. Follow the right wall of the corridor and watch out for the camera. Past the camera is a large open two-level room with adjacent smaller rooms and gravshafts leading up. The red cyborg will most likely hide out in the back, quite possibly in the big conference room. Kill him and get the Quantum Simulation chip, and search the small rooms for goodies (ammo, nanites, 2 Cyber Modules). One strategy for killing the red cyborg is to go up to one of the smaller rooms overlooking the conference room, break the window and take him out from there. The chip you just got goes with the Simulation unit you discovered earlier in sector C. Leave the large open room and follow the right wall of the corridor back out to the Xerxes room with the elevator, where you started. Make your way to the Quantum Simulation unit (through bulkhead 42), insert the Quantum Simulation chip and get back to this room again. Now go through the last bulkhead door (43).
You are now in the D sector. There's quite a lot of respawning in the entire D sector, so be careful. You'd want to turn right in the corridor, but look out for the turret. Past the turret, turn right. (Note: due to some odd bug I've had some problems shooting enemies in the area near this turret, it's like some invisible shield that blocks out my shots. I suspect some minor architectural mistake, I haven't checked it in ShockEd yet. If it happens to you too, just look for some other place to shoot from). Watch out for the camera and activate the QBR machine. While standing by the QBR, you'll see a replicator (O4). If hacked, this replicator sells you a recycler, which is a very handy tool I'd heartily recommend. Watch out when hacking the replicator, there are lots of monsters around. Near this replicator is also an armoury (keycode 13433) with am assault rifle and a Security droid inside. Also, there's another turret around the corner, and a recharging station and a Security Control station too. The door to the right of the recharging station leads to a crew quarters with bunkbeds (goodies: nanites, 3 Cyber Modules) which provides you with some funding if you can't afford the recycler.
If you can hack the Security Control station, do so. To the left of the recharging station is a room with a turret and a Security droid. Be careful! Note that this room is D-shaped on the map. Remember this room, you'll run through here later on. The next room contains the last red assassin cyborg. If you can't kill him he'll run away like the last one did, but don't worry, you'll catch up to him later. Instead, in the room he appeared, there should be three doors (actually four, counting the way you came in). Take the one on the right and you'll end up in a demolished corridor dead-end. This is a pretty good place to catch your breath and pick up the medkit and 3 Cyber Modules on the floor. Never mind about the rubble, you can't get past it no matter how hard you try.
Ok, ready to leave? Good. Go back to the assassin room (he might have gotten back to this room). Take the door on the right and watch out for the camera. There's a door here with a keycard slot. Remember this door; once you get the keycard (on a different deck than Ops) you'll need to return here. This is why the D-shaped room is good to remember, it's easy to find on the map. Now, opposite the locked door is a ramp down to some small rooms with some goodies (ammo, an incomplete surgical unit, a helpful log from Bronson, 2 Cyber Modules) that you might wish to explore. When you're done here, go back to the assassin room and turn right.
You are now in an L-shaped corridor. Around the corner to the right is a ramp down to the place where the red cyborg will run to, so in case you haven't killed him yet there's a good chance he's there. There's also a camera to watch out for. Now, if you've killed the red cyborg, resist the urge to go down the ramp for now, and go to the small room on the left instead. Go down with the small lift to the prison area. One prison cell is unlocked. On the dead body inside you'll find a WormBlood implant (requires Research skill 4 and the chemical Cu) and a few worms. If you get trapped, break the glass in the ceiling and then destroy the junction box. Go up the lift again and then to the left, down the ramp, where I told you not to go earlier. On the body of the last red cyborg you'll find the Linear Simulation chip.
In the room down there you'll find a simulation unit, the Linear Simulation unit (labeled 2), and some goodies (ammo, a laser pistol, nanites, hypos). Insert the Linear Simulation chip into the unit. (Note: people have told me
you need the Security access card found on the Engineering level to enter this room, but when I tried to enter without having picked
up this card I still got in. If you can't enter the room, check if you have this card, and if you don't have it
go back to Engineering to get it.)
Go back up again, back to the assassin room and through the D-shaped room, past the recharging station, QBR machine and to the turret. There's a door to another crew quarters with bunkbeds (goodies: BrawnBoost implant, nanites) behind the turret, and around the corner to the right there's another turret. Straight ahead there's a small room with four upgrade units (Weapons/Stats/Tech/Psi) and a dead body with 3 Cyber Modules. Standing in this small room looking out, to the left you have the turret I mentioned and a shooting range (pretty dull, some ammo) and to the right is the way you came in. Go right, you'll hopefully recognise the corridor. To the left is the bulkhead where you came in, to the right is the way to the last simulation unit. There is a group of connected small rooms, one of which contains an Auto-repair device. If you wish you can climb the ladder in one of the rooms and pick up a Stasis Field Generator (broken) and 3 Cyber Modules from a dead body, otherwise just run past them and towards a door. Immidiately to the right after the door is a turret, and to the left is a corridor with a camera. Either way you go, you'll end up in the same area, but I suggest turning right (the turret corridor) and then taking the first door on the left, where you find an ExperTech implant. You can explore the nearby rooms, but take care when you find a dark room with two ladders leading down.
Go down the ladder of your choice. Watch out for the two eggs on the same wall as the ladders. You'll see another room with the last simulation unit. This is a trap. When you get close to the sim unit, four spiders will attack you, so be prepared to either run fast or kill some spiders. If you can't run fast enough to insert the chip before the spiders catch you (hint: speed hypo), just trigger the trap and run towards the ladders. Climb up a bit and slowly take out the spiders, one by one. Or just stay down there with them and do some REAL fighting. Anti-toxin hypos are helpful.
Down in this room you'll find the Interpolar Simulation unit, a French-Epstein device, a laser rapier and a pistol. Insert the Interpolated Simulation chip. Make your way back to the bulkhead, then to the elevator. Before you go to deck 5 it might be a good idea to go find that basketball you dropped off earlier.
Go back to the top of this page
Deck 5: Recreational
Main goal: Activate transmitter tower in athletics area
How: Read transmitter code on four art terminals scattered across the deck
Chemicals needed for research on items found on this deck:
- Viral Proliferator: Tc, Te
- Rumbler organ: Mo
Keycard locations:
- Crew section access card in garden area
- Gym access card in crew section
Keycodes:
- Small door near upgrade units in sector A: 12345
- Armoury in crew section of sector A: 11111
- Recharger room in sector B: 50220
Goodies: 3 EMP rifles, one in QBR room in sector A near the elevator, one in sector C in the movie theatre, one in sector B recharger room. SwiftBoost implant in sector C casino. 2 WormMind implants, one in sector C recharger room, one on hybrid near sector B security station. 2 Standard-issue combat armor, one in sector B garden grave area, one in sector A upper crew level. EndurBoost implant in sector B dining hall. ICE-pick in narrow corridor leading to sector B recharger room. ExperTech implant in sector A crew area, lower level. Auto-repair unit in sector A crew area, upper level. Crystal shard, suit of heavy combat armor and Viral Proliferator in sector A crew area armoury, upper level. Fusion cannon by sector A basketball court.
Detailed walkthrough (spoilers!):
You start in sector A. Go right when you leave the elevator, walk up to the window and wave to Cortez. Try the door on the left from the elevator, it's locked. The door opposing it leads to a corridor. Pick up the dead power cell from the body. To the left is the med annex; a corridor with a QBR machine and an EMP rifle, and a bulkhead door at the end you should avoid for now. To the right is a camera and some monkeys. Behind the desk is a nice little art terminal on the wall. Art is nice. Watch the art. Click the terminal to see different paintings. Remember the number "10". There's a small door behind the desk (keycode 12345), with some goodies.
On the opposite side of the corridor from the desk is a little room with four upgrade units (Weapons/Tech/Stats/Psi). Continue forward through the corridor, and you'll find the gym entrance on your left. It's locked. On the right side of the corridor is a small room with a replicator (R1). Continuing through the corridor and you'll find a bulkhead door leading to the mall. You might want to check out the rooms to the right first, though. Go through the bulkhead.
You're now in sector C. To the right is a movie theatre lobby with a replicator (R2), and in the viewing room next to the lobby you can find an EMP rifle and 5 Cyber Modules. Continue up the ramp in the corridor. On the right are some dull restrooms and on the left a casino with 4 Cyber Modules and a SwiftBoost implant. At the end of the corridor is a down ramp and a door, followed to a turret and a camera on the other side.
In this next corridor, the first room on the right has an incomplete surgical unit and the second a QBR machine and 6 Cyber modules. The room on the left has a recharging station, two upgrade units (Weapons/Psi) and a WormMind implant. The corridor ends where it meets another, with the mall to the right and the porn club on the left. The porn club might well be worth a visit, but don't expect anything vaguely erotic.
Watch out for the camera and run up the stairs to the replicator (R3). Purchase a Nikki access card and use it on the third door, pick up a big pile of nanites and 10 Cyber Modules. Run down the stairs again and enter the mall.
Watch out for the large droids patrolling the mall. On the bottom floor you can find four upgrade units (2 Tech, 2 Stats), an OS upgrade unit and 8 Cyber Modules (and a broken replicator, R7). On the top floor
are some replicators (R4, R5,
R8, R9) and a few art terminals. Art is nice. Watch the art. Click the terminal to see different paintings. Remember the number "4". On the far end of the mall are two exits; one inaccessible to the crew area and one to the garden. Go watch some plants.
The garden area is in sector B. The garden consists of two rooms. In the first room there's a lower level with two doors, one of which leads to the graves area, which is trapped in certain ways. Save before you enter. The keycode to the first grave area is 34093, and there you'll find a standard-issue combat armor, 4 Cyber Modules and some goodies. In the second area you'll find a crew quarters access card, a definite must-have. Go up the way you came. Both garden rooms have exits to blue corridors, I suggest you take the one from the second room (it doesn't really matter which, but since this walkthrough is linear I say pick that one).
To the right is a small, oddly shaped conference room, and to the left an uninteresting kitchen. Ignore both. Take a left where the corridor meets another, and watch out for the camera. Another right, then left again to the dining hall, which is an open room in two levels. Run around quickly along the side towards the far door. It's a trap. Kill the cyborg assassin when the door opens. Back up a few steps and take the lift to the bottom floor to pick up some goodies (nanites, 8 Cyber Modules, EndurBoost implant), then go up again and out the way you came in.
Across the corridor from the dining hall is a couple of restrooms that are quite dull, unless you really really have to go. Instead, go down the ramp and watch out for a hybrid and a big droid, with a turret and camera not far behind. Before the up ramp towards said turret there are two doors, one on each side. The one on the left leads to a pool room with a broken replicator (R6), and some nice artwork on the wall. Art is nice. Watch the art. Click the terminal to see different paintings. Remember the code "[1". There's nothing much up the gravshaft, just a hybrid, a crystal shard and a psi amp. The door on the opposite side of the corridor leads to the "Bon Chance" lounge. It's a trap. There are 2 Cyber Modules, some ammo and nanites, in case you'd risk it. Otherwise, go up the ramp in the corridor to the aforementioned turret. The door on the right contains 5 Cyber Modules.
From the turret room there's a narrow corridor to the left, but let's ignore that for now and go for the door on the right instead, and follow that corridor. You'll get to a point where you can turn right. Straight ahead is a bulkhead door which leads back to sector A (and the elevator), but let's turn right (camera). There's a door with a broken keypad (keycode 50220). If you're not too keen on doing some repairing, there's another way in, through the narrow corridor by the turret I mentioned a little while ago. Inside, there's a recharging station an EMP rifle, 5 Cyber Modules and a switch that unlock a floor hatch a bit further on, so either way you choose (repair keypad or narrow corridor) it's a good idea to go in. By taking the narrow corridor entrance you'll gain some nanites, a medkit, and an ICE-pick.
Outside the room is a ramp up to a QBR machine on the left and a floor hatch on the right (3 Cyber Modules), and past that a bulkhead door to the left that leads to the crew quarters, but ignore that for now. Also ignore the path to the right where the corridor bends a bit. Now, on your left is a cold storage (3 Cyber Modules) and on your right is a chemical storeroom. Straight ahead is the garden area, where you've already been. Ok, now turn around and take a left at that bend. On your right is a dining hall with an assault droid and 6 Cyber Modules. Past that is an area you've already been to, so let's go to the crew area.
The crew area is a two-level open area with patrolling large droids, many small crew rooms around the walls and an elevator in the middle, which leads to the Command deck (deck 6). In one of the rooms of the lower level you should find an ExperTech implant. On the upper level, there are more stuff. An Auto-repair unit, 3 Cyber Modules, a standard-issue combat armor. Many interesting things can be found in the locked room, keycode 11111: a crystal shard, a suit of heavy combat armour (requires strength of 6), 10 Cyber Modules and a Viral Proliferator (requires chemicals Tc and Te to be researched). In one room hangs an art terminal at an odd angle. Art is nice. Watch the art. Click the terminal to see different paintings. Remember the code "6]". In a room with a dead body on a bed and a pile of vodka bottles you'll find the important Athletic Sector access card, which will allow you access to the gym. Go to the gym, it's near the elevator where you first enter this deck.
You'll enter the gym by the lockers and showers. You'll find a short corridor with two doors. Choose the one closest to you, and you'll enter the basketball court and find some company. Once you've killed the Rumbler you might get a rumbler organ (requires chemical Mo to be researched). You'll see a small air duct opening to your right, which leads to the pool. Go to the recharging station in the room by the pool and insert the now charged power cell into the power cell receptor, and take the same way back to the basketball court, which is now lit up again. Go up the gravshaft and take out the two assassin cyborgs to get to the transmitter tower controller. Enter the code. What code? Haven't you been taking your art classes? Let's see: 6], [1, 4, 10. Reorder as appropriate (14106). You'll also find a broken fusion cannon here. Search your pockets for that basketball and shoot some hoops - maybe something neat will happen if you score. This is a good spot to shoot from.
Go to the elevator in the center of the crew area and take it to the Command deck, but watch out for some baddies on the way.
Go back to the top of this page
Deck 6: Command
Main goals: get the Ops override access card, destroy the shuttles
How: get the Bridge access card by the escape pods to gain access to the bridge elevator, since the Ops card is on the bridge. The shuttle bay access card is in a security station near the officers' quarters.
Detailed walkthrough (spoilers!):
You start out in sector A. Watch out, there's an assassin cyborg just to the left of you. Take the door to the Tram (always, always read the signs on the floor!), the other door is locked for now. To the left are two upgrade units (Stats/Psi) and 7 Cyber Modules. Continue past the recharging station to the Tram lobby, with two replicators (C1 and C5) and 3 Cyber Modules. Step into the Tram car and push the button.
On the first Tram stop, there are two turrets, 4 Cyber Modules and a laser pistol. You can ignore this station for now, and continue to the next.
The last Tram stop pretty much just leads to a bulkhead door, but just before the bulkhead you can pick up 6 Cyber Modules. Go through the bulkhead.
In sector B you'll find yourself in a larger Tram lobby, with a little fountain, a replicator (C2), a crystal shard, an assault rifle, an incomplete surgical unit and 5 Cyber Modules. Straight ahead is the elevator to the bridge, but that's currently inaccessible. Go around the elevator column to two smaller lifts, which will take you to a similar room with two more lifts and two doors. First, take the door closest to where you came in, and destroy the camera and turret. The door by the turret leads to a broken bridge, so back out and take the second door. This will take you to a room overlooking the large Tram lobby where you came in. There's a laser rapier on the floor. Continue to a lounge with a pool table and an assault droid.
To the left are some restrooms with 8 Cyber Modules. Straight ahead, behind the pool table, are ladders up to the officers' quarters and a security station, and to the right some stuff we'll discover later. Go up the ladder and watch out for the protocol droids. Search the four sleeping quarters around the outer walls for goodies (ammo, nanites, hypos, grenade launcher, broken stasis field generator, 6 Cyber Modules, medkit) and an audio log with a keycode to the security station in the center. Enter the security station (keycode 83273) and pick up the Shuttle bay access card. There's also an EMP rifle and some goodies in there. Opposite to the security station is a chemical storage. Go down the ladder again and take the unexplored path.
The dead body contains a broken grenade launcher. Watch out for the droids around the corner, cyborgs and a large one. You can go down the ladder for a QBR machine, 6 Cyber Modules (on the ledge by the pipes) and an upgrade station (Tech), then up again and around the corner to the escape pods. There are four pod launching areas, and if you search them all you'll find the important Bridge access card, 7 Cyber Modules and a French-Epstein device. There's an upgrade station (Weapons) in the end of the corridor, and next to that is a door to that broken bridge you watched from the other side earlier. Jump across it, and be thankful there's no turret on the other side anymore (you did destroy it, right?)
Now you're back in the room with the four lifts. There are still two lifts going up that you haven't explored. If you go up there you'll find a replicator (C3) and a suit of heavy combat armor.
Go down to the bridge elevator door, and use the Bridge access card to enter. Watch out for the Assault droid once you get up. (There's a broken EMP rifle behind the elevator button wall). The bridge is a large open room with a turret and a camera, an Auto-repair device under a console and 8 Cyber Modules near the turret. Go up the gravshafts in the far end and watch out for another turret. There are some goodies there (medkit, ICE-pick) as well as the important Ops override access card. Now that you've got the card, go down to Ops; down the bridge elevator, ride the tram back to the command elevator and go to deck 5, then use the elevator on that deck to get to deck 4.
On Ops, run past the D-shaped room I mentioned in my Ops section above to the security station and use the computer on the wall. Take the elevator to deck 1 and run to the core. Take the lift up to the control room and go out to the keypad and enter the code 94834. Use the computer and go back to the Command deck again.
Now, when you're back on the Command deck, the previously locked door to the shuttle bays is now open. Run up to the bays. One of the bays is accessible from the corridor, and inside you can find some goodies (nanites, hypos, ammo, an Auto-repair device). The corridor also intersects with another long corridor with gravshafts at the far end that will take you up to the shuttle control room. After the gravshafts is a small room with a replicator (C4) and two doors. DO NOT HACK THE REPLICATOR YET! Go through the right door and deactivate the shield with the console. Continue through the next door and destroy the shuttle with the weapon of your choice (there's also a French-Epstein device on the ledge by the window). Go back to the replicator and take the other door. Kill the MidWife who bashed the control computer. Damn, how do we now disable the shield? Hack the replicator! Buy the Sympathetic Resonator and climb down the ladder and use it on the shield generator and then climb up again real fast. (If you screwed up and did hack the replicator before being instructed to do so, don't have a heart attack. You can cheat your way to the Sympathetic Resonator by pressing Shift-; which brings up a small command window and enter the command "summon_obj big bomb", without the quotes.) Once the shuttle is destroyed, the previously inaccessible shuttle bay is opened, since the broken door is blown clear by the explosion. You can go down there and explore (get some goodies, and possibly some new plot insight, but no Cyber Modules) although your guide will instruct you not to.
Go back to the central Tram stop, the one with the turrets. The door is now open, but a shield prevents you from entering. Go back to the bridge. There's a Psi reaver there that's responsible for the shield. If you destroy it, it will respawn. If you go up by the gravshafts to where you found the Ops override card you'll find a Psi reaver brain structure. If you destroy that, the reaver itself will not respawn. Now kill the reaver and pick up a psi reaver organ (required chemical for research: Ra). Note: to remove the shield, you actually only have to kill the reaver once, but I'll advise you to kill the brain as well, since if you do you'll also get the reaver organ and some insight to how they work. Go back to the middle Tram stop. There's a complete surgical unit by the gravshafts you might wish to use before you go up to the Rickenbacker.
Go back to the top of this page
Rickenbacker Pod 1
Main goals: destroy the 16 black eggs, reverse gravity for pod 2
How: too complex to give a short explanation, read the walkthrough
Detailed walkthrough (spoilers!):
The map of the Rickenbacker is pretty useless, so learn to live without it. You start out in a small lobby with an upgrade unit (Psi). Go up the ladder and watch out for the turrets. You'll climb up to a cargo area with a black egg near a ladder and another ladder on the opposite wall. Climb up the second ladder and you'll find another black egg, and a view of a third egg through an unbreakable window. Destroy the egg near you, then climb down and destroy the one by the ladder. Climb the ladder where the first egg used to be to get to a control room. Push the button to raise the bulk-door-thingy, and two rumblers and an assault droid will be released.
Go down to the room where they came out (camera!), and around the corner you'll find an upgrade unit (Weapons). Destroy that third black egg under the ceiling you saw through the window earlier. There's a dead body in the corner to your left. Follow that left wall for a while and you'll find a crate and a down ramp. Just around the corner is a spider and a cyborg, and since that's where you'd want to go you'll have to watch out. You'll enter a large open area where a piece of the floor has been blown away. Look around and you should see the fourth black egg. Destroy it. There's also a small room behind you. Go in, push the button and watch what happens. Go back to the room with the crate and down ramp, and go down the ramp to destroy the fifth black egg. Continue through the red-lit narrow passage until you reach an intersection, where you take a right.
You'll enter a room which is on the opposite side of the hole in the floor, and look - there's another button. Use it and see what happens. There's also a ladder leading down to where the fourth black egg used to be (you did destroy it, right?) but I'd advise against going down there since you might fall to your imminent death. Go back through the narrow passage from where you came and take the unexplored path (spider!). You'll exit the passageway on a ledge. Go to where the railing is broken and jump down. Jump across to the platform on your right, then climb down the ladder to the two corpses. Continue past them and you'll be at the large beam you just extended to provide a walkway. Walk along it until you reach the second beam (that you also extended), which you'll have to jump to. Follow that beam to a small room (contains a Viral Proliferator) to pick up a Rickenbacker access card which is very important, then go back the way you came to those two corpses. You'll notice there's a ladder leading up. Climb it as far as possible, then jump across to the second ladder and continue upwards. In the room up there you'll find the sixth black egg, which you promptly destroy, and a door to a red-lit corridor.
Take two left turns and you're in a chemical storeroom. Follow the right wall to a cremation room, like the one on MedSci, with a Rumbler and the seventh black egg. Be careful if you decide to enter the room, because two turrets are looking your way. If you can, destroy the rumbler and the egg without entering the room. You might want to take out the turrets too, but do that after the rumbler is dead, or he'll most certainly want to welcome you heartily. Incidently, just behind those two turrets is the eighth black egg, which you also destroy. Go back to the chemstorage and take a left in the red corridor.
At the next intersection you'll find another Viral Proliferator. You'll want to take a right, but watch out for the turret in the end of the corridor. Go towards the turret, but watch out for another turret and a camera on your left. The room on your left also contains the ninth black egg and a French-Epstein device. Destroy the egg and go back to the last intersection where the Viral Proliferator was, and take the other path. Watch out for a turret on your left as you enter the next room. If you look over the railing you'll see the tenth black egg. Destroy it. Listen to the voice of the upset cyborg. You'll have to take the ladder down, but he'll be waiting for you so be careful.
Once you're down you'll find a room with a QBR machine, a high-security crate (WormBlood implant, fusion cannon) and a replicator (RB1). To the right of the replicator is a room with a turret, and in the nearby room you'll find black eggs number eleven and twelwe. Destroy both and go through the door. Once you drop down the ramp there's a turret to your right. There's only one exit, which leads you to a parallell corridor with a ladder. Just above you is another turret to the left, so watch out when you climb up. Behind the steam is another ladder, this time with a turret to the right of you as you climb up, hidden behind some steam. And, just behind that steam and turret is the thirteenth black egg, which you also must destroy. (People often miss this egg, since it's obscured by steam). On the opposite side of the ladder is an exit to another parallell corridor with a ladder leading down. There's a turret to the left when you get down, and the Gravitronic Generator Control to the right. Use the button and turn around, and you'll be able to leave this area to your left.
Go back through the QBR machine room and up the ladder, then past the chemical storeroom in the red corridor and then left around the corner to an unexplored area. The room behind the door contains three turrets, a Security Control Station and an ICE-pick, which suggests one obvious way to handle the problem if you're quick enough. Otherwise, just destroy the turrets.
In the next room is an incomplete surgical unit and a window. You can actually go through this window and have a little spacewalk. This is a bug. Many people have done this, but for some reason seem to forget exactly where they did it. This is the place. Now you now.
Continue to a corridor. If you take a right, you can pick up a medkit and turn back, so I'll just describe what's to the left. Past the door is the fourteenth black egg up on a wall. Destroy it. Go down the ramp, then up a ladder. You'll see another ladder, but once you get up you'll be greeted by an Assault droid, so watch it. Past the droid is a door which leads to a large room with a replicator (RB2) and another big droid. In this room you'll also find the fifteenth black egg. Destroy it. The way out leads to the torpedo room, in which many a brave man has cried in despair. Watch out for the two turrets. Walk around to the control desk. You'll notice that there are four buttons, one for each torpedo. The solution is really quite simple. If you press a button once, the corresponding torpedo will be raised. Hence, press the buttons, from left to right: 2, 2, 1 and 2 times. Then walk up to the torpedo on your far right and climb it. Climb the ledge on your left and follow it up to the second torpedo. Past that is a little walkway to the third. Jump from the fourth to the ladder and climb up, and you'll be greeted by a cyborg.
In this room is a Security Control Computer, and it's a good idea to hack security now if you can. In the next room you'll see a ladder. There's a turret on your right once you get up, and another turret that will have a clear shot at your back. There's also a camera. Past that is a small room where you can grab 5 Cyber Modules through a grating. The next room is a bit amusing.
Past the three hybrids is a room with an INSANE amount of radiation. But, you'll avoid that by pushing the button in the nearby control room and watch the torpedoes fly away. The radiation room is now clean. Nice.
Past that is a little U-turn with a camera at the end, then a ladder. Climb the ladder a little bit, and you can see a room you can get to with 5 Cyber Modules and not much else. By now, that isn't very much, so you might as well continue climbing. You'll reach a room with two turrets and an excited rumbler, and a medkit behind some pipes. Beyond that is, finally the last black egg. Destroy! Destroy! Destroy!
There are also two upgrade units (Stats/Tech) and an elevator in this room. Take the elevator, will you?
Go back to the top of this page
Rickenbacker Pod 2
Main goal: get to the bridge
How: survive
Detailed walkthrough (spoilers!):
Now, for some reason I had a bit of trouble getting out of this elevator, before it occurred to me I could jump. Doh!
This area is a bit... odd. It's your fault. It's upside-down. You did this.
From the first room, if you position yourself just right, you can see a turret two rooms away, and thereby you can destroy it with risking getting shot yourself. Continue past that turret and turn left into the church (Whoa! Satan!). As soon as you enter, an Assault droid will greet you from the back. Also, there are 3 cyborgs inside to welcome you. There's an audio log on the floor which might explain things, specifically the details regarding your first encounter with Polito on Ops.
Go back into the corridor. You'll get to an area with some pipes, watch out for the turret. There are 6 Cyber Modules if you climb down. Heading towards the turret you find a WormSkin armor (chemicals required: Hs, Tc) and another crystal shard. Past the turret is a ladder which takes you up (down?) to the medical section.
There's a spider on each side of the entrance, as well as one on the upper level. I'd suggest you destroy all three before you climb up the ladder. You'll also find a suit of heavy combat armor. In the next room there are two spiders down below, as well as a dead body of some special interest. On/near the body you'll find a Captain's quarters access card, an audio log explaining things and a WormHeart Implant (Research skill 5 required, chemicals needed: Cs, Hs). Continue to the elevator.
Go back to the top of this page
Rickenbacker Bridge
Main goal: use escape pod
How: well, just press the button, really...
Detailed walkthrough (spoilers!):
You're now on the Rickenbacker bridge. Watch out for the swarm trap outside the elevator. Nice to see things aren't upside-down anymore. Go through the door and face left, and prepare for some rumblers & spiders. There's an OS upgrade unit you might wish to use. The room behind you houses another spider and an egg, and some ammo. Around the corner from those suspicious looking boxes hides a camera and a ladder down to the escape pod. Don't go down there just yet. Beyond that room is a larger room with three turrets, one of which is quite close to you. Near that turret are four upgrade units (Weapons/Psi/Tech/Stats) and to the right is a door to the actual bridge. Past the upgrade units is a replicator (RB3), and after that, the captain's quarters. Go there and pick up that odd looking worm-thingy on the wall. It's an Annelid Launcher (Research skill 6 required, chemicals needed: Mo, Se). Now, you can do some sightseeing if you want, to familiarise yourself with the bridge, then go down that ladder and blast off with the escape pod. (Before you press the launch button, take note that this is your last chance to go back to the Von Braun for supplies and equipment. In fact, you can go all the way back to that airlock door in cryo just past the first recharger if you want. Once you press the launch button, however, you can't go back, not even to the Rickenbacker.)
Go back to the top of this page
Body Of The Many
Main goal: destroy the brain of the Many
How: destroy two nerve clusters to open first sphincter, destroy another nerve cluster to open the second sphincter. Destroy the three stars orbiting the brain.
Detailed walkthrough (spoilers!):
You are now inside the body of the Many. Gross! There's no map available here, and the architecture is quite non-angular, so it's a good idea to switch on your HUD compass if you haven't done so already (Alt-C). You start out in the remains of the escape pod. Leave it, and walk on the squishy-sounding gooey "floor" until you reach some green stuff dripping down from the "ceiling". Get used to that disgusting squishy sound, you'll hear lots of it. To your left is a membrane of some sort, and behind that probably a spider and a rumbler. Walk out into a larger "hall" and face it, heading between 270 and 0. You'll see a body (with a suit of heavy combat armor) and a crystal shard in the middle of the "hall". To your left is a small opening leading down to a membrane. Behind it is a watery area with a Psi reaver. Destroy it, and then quickly destroy its nearby brain structure before the reaver respawns. In the water you should find 10 Cyber Modules. Above the water lever you'll see a nerve cluster. Destroy it, then return the way you came in, and up to the "hall" with the crystal shard.
To your right you should see path leading upwards to a piece of the Rickenbacker. There are some eggs inside to watch out for, as well as a replicator (B1), 10 Cyber Modules, some goodies and some chemicals. Go back down to the "hall" and turn right.
The "hall" makes a left turn, and you see another "hall" (heading between 180 and 270) with green stuff dripping down in the middle. There's a path to your right which you should take, since straight ahead you'll only end up in the same area with the nerve cluster you destroyed earlier (the reason to destroy it earlier was to spot the brain structure easier and thus save some health points). Take a right, as I said, followed by another right and a slight left.
You should now be looking down a "corridor" (heading 0) with some blowy-thingy on the "floor" in the middle. There's a body with a Viral Proliferator near a path down to the left, leading to another section of the Rickenbacker. Straight ahead is a little turn, then another path down to the left to a spider, then a watery area with some radiation. This is where you'd want to go.
This part is a little tricky to find your way around in, it's a bit of a maze. I'll try to guide you, but the main idea is to find a second nerve cluster, destroy it, and return the way you came. Ok, here goes: in the first room (with a floating table), there's only one underwater exit. This leads to a small "room" with two exits. Either one will do fine, since they lead to the same "room". You'll find yourself in another "room" with two exits close to each other, one in the "ceiling" and one other below it. It might be a good idea to take the upper one, since it leads to an air pocket where you can relax and slap on some anti-rads. Then, take the lower one to a larger "room" where you can go up for air. Continue forward, then right, and you'll find the nerve cluster. Destroy it and return the way you came. When you get back to the room with the floating table, look for the exit near the surface, and you're back where you came. Go up to the "corridor" again and face a membrane on your left.
Behind the membrane there's probably a spider and a rumbler. You'll notice the water-covered "floor", which is a good way to keep track of where you are. Now, in this area there might be a few MidWives. Take a left and walk towards a Rickenbacker wall by a dead body. Continue past it and make a U-turn to the left into a narrow "corridor" filled with eggs. Past the eggs is a larger section of the Rickenbacker with a chemical storage, recharger station four upgrade units (Weapons/Stats/Tech/Psi). There's also a replicator (the last one in the game, B2) that in spite of shooting sparks still seems to work (?!). Return the way you came and take a right by the dead body and that bubbly-thingy.
On your left you'll have a narrow opening, straight ahead you can return to the non-watery area. Turn left and face a big sphincter thingy. If you've destroyed both nerve clusters it should be open, if not go back and destroy them. Enter through the sphincter. You'll probably encounter a MidWife and a spider, and start to hear some grinding noise.
You'll enter a small room with a little water pool in the middle surrounded by some teeth-like thingys. You'll see a big, giant tooth-like thingy moving up and down in the next room. Walk past that. Another MidWife and spider, and a path leading upwards. Now you'll get to the one part of this game I really really hate: the godawful teeth-jumping. Save the game. Now, you should see two pairs of giant "teeth" moving up and down. Behind them are two openings. The upper one leads to a nerve cluster you must destroy, and the lower one leads to another sphincter that won't open until the nerver cluster has been destroyed. (Damn, I hate this part. I've played the game 50+ times, but only up to this point. I've so far only actually completed the game a dozen or so times, just because of this damn jumping.)
Jump on to the first set of teeth. From there you should be able to jump to the nerve cluster, of at least jump close enough to climb up there ("A sturdy nerve. Climbable?" Yes). Destroy the nerve cluster. I've managed to jump/climb down to the sphincter (not sure exactly how, maybe I bounced off a tooth, taking some damage), but I suppose you should be able to jump to it from a tooth. There's a little side-room at the bottom with 10 Cyber Modules, so I assume you can make your way up by first jumping onto one tooth, then from that to another, then to the sphincter, but I just don't have the patience to try this. I'm just happy to get to the sphincter as soon as possible.
Past the sphincter is a corridor with some blowy-thingies and a rumbler that leads to a room with three exits. To the left is a MidWife, some eggs and another Rickenbacker section, to the right the womb, crawling with spiders and eggs and a few goodies. Take the middle exit, which leads to a room with a rumbler. The room's only exit leads to a membrane, and behind that is large open room with water. Save the game. Jump down into the water.
Once you surface you'll probably be attacked by Psi reavers and rumblers. Run upwards to a large room with a brain-thingy in the middle. This is the brain of the Many. It must be destroyed. To do so, first destroy the three yellow stars orbiting it, then the brain itself. This can be quite hard, since there are heaps of Psi reavers, spiders and rumblers in the room. To destroy the Psi reavers you have to destroy their brain structures, which can be found behind two "walls" in the room. These walls also provide you with some nice cover. Psi invisibility can help you a lot around here. Once you've destroyed the brain, walk up to it and drop down in the hole it left open, and fall down into a stream of water.
Go back to the top of this page
Where Am I?
Main goal: destroy main opponent
How: hack three terminals to power down shield, then use appropriate amount of violence
Detailed walkthrough (spoilers!):
You're back on the Rickenbacker bridge. Or are you? It's a bit different, somehow. Make your way to the actual bridge. From there, you see an exit, cyberspace style. From this point on, there are virtual assassin cyborgs running around. Beyond cyberspace is a normal room. If you've played System Shock 1, you should feel right at home here. This is the starting point from SS1, the medical sector of Citadel Station. If you HAVE played SS1, all I need to say now is "make your way to where the hopper was", and you'll find it. Then skip down a couple of paragraphs. If not, stay tuned.
Walk down the ramp and take a right and you'll find an incomplete surgical unit. Take a left, and up the ramp you'll find a recharging station. From the recharger, walk down the ramp again and to your left. Don't bother with the cameras, they're just decorational here. Through another door and thing start to look more like cyberspace again. There's a storage room to the left, and a large corridor to the right. Go right.
There are some rooms here and there, but they're mostly uninteresting. Turn right where the corridor is lit up. At the next intersection it doesn't really matter if you go left or right, you just want to get around to the other side. One right followed by two lefts, or the other way around. When you see two cameras, go to the opposite wall. You'll find a crude set of stairs leading up and down. There's no need to go up, unless you really really need a maintenance tool. Go down. Eventually, you'll find an opening, then a last audio log. After that, it's just a drop down to the final battle. Check your weapons, use any hypos, save the game, take a deep breath and jump down.
There are three terminals you can hack to lower the shields. It's good to have saved three ICE-picks for this, since you don't have much time. You must move fast. The floor will burn you and the shadowy avatars will shoot at you. Once the shields are down, blast at that thingy in the middle. I'm on purpose avoiding to be more specific, I refuse to use a certain word to describe what's in the center of this room. In fact, never in this whole walkthrough have I mentioned that word, which would be quite appropriate to use here. Anyway, destroy the thing and watch the endgame sequence. The end.
Go back to the top of this page
Personal comments:
I was a bit let down by the ending. The "Naah" was too cheesy, and most likely stolen from the game UFO: Enemy Unknown (or X-Com in the US), which the designers were admittedly inspired by (check the inventory screen for one thing). Actually, the whole game sort of went downhill after leaving the Von Braun; the first Rickenbacker pod was, while very very linear, still quite entertaining. The second pod (upside-down) was basically just transport, and the bridge was just find-the-escape-pod. At first I really didn't like the Body of the Many (especially that squishy sound), but after having played the game a few times I wish that BOTM was bigger than it is. I thought it was really cool to return to the Citadel, but there wasn't nearly enough of it. And the last fight, well that was just plain fingertip speed. I suspect project deadlines rushed the ending a bit, since it seemed to get smaller and smaller, and less and less sophisticated, the closer to the end you got.
That said, System Shock 2 is quite possibly my all-time favourite game ever, knocking down the original System Shock from the top spot. Or maybe they'll share it, I don't know. I like the story more in SS1, but the expanded gameplay in SS2 is really good, with more of an RPG edge than SS1 had. I like RPG:s. Sometimes.
When I first played the SS2 demo, I was so incredibly scared by the hybrids, especially those creepy voices. I was actually scared. I'm 29. I'm never scared. I can get a bit tense when watching a supposedly scary movie, but that's usually just due to "scary music" and sudden noises. When I played SS2, I was really really scared for the first time since I don't know when. Running around MedSci a million times in the demo until I could get the actual game was pure bliss, and once I actually got the game it was so very hard to put down. The sounds, the architecture, the lighting, the story, the problems, the various possible solutions, the character developement... I'd say SS2 is one really really good game. And that's just my opinion.
/Jonas H-son (Gray), 2001-01-31
Go back to the top of this page
Replicators
Note: All prices and items are for 'Normal' game difficulty setting. At least prices vary with difficulty setting. Please report any errors to me and I'll fix them.
Deck 1: Engineering
E1
Location: sector A, room with the elevator
Contains:
|
normal
|
hacked
|
|
Soda can
|
3
|
-
| |
Fragmentation grenade clip
|
100
|
75
| |
Psi hypo
|
75
|
40
| |
Medical hypo
|
30
|
20
| |
6 Armor-piercing bullets
|
-
|
90
|
E2
Location: sector B, cargo bay 1
Contains:
|
normal
|
hacked
|
|
Soda can
|
3
|
-
| |
Disposable maintenance tool
|
60
|
45
| |
Rifled slugs
|
80
|
60
| |
Strength booster
|
50
|
35
| |
Anti-personnell shotgun shells
|
-
|
70
|
E3 (broken)
Location: sector B, cargo bay 2
Contains:
|
normal
|
hacked
|
|
Cigarettes
|
5
|
-
| |
Portable battery
|
85
|
65
| |
6 standard bullets
|
60
|
45
| |
Anti-radiation hypo
|
35
|
25
| |
Version 1 repair software
|
-
|
25
|
E4
Location: sector A, room with floor hatch near the core
Contains:
|
normal
|
hacked
|
|
Cigarettes
|
5
|
-
| |
6 standard bullets
|
60
|
45
| |
Anti-toxin hypo
|
35
|
25
| |
Psi hypo
|
75
|
40
| |
Proximity grenade clip
|
-
|
80
|
Deck 2: MedSci
M1
Location: science sector, room with Xerxes display near the elevator
Contains:
|
normal
|
hacked
|
|
Bag of chips
|
3
|
-
| |
12 standard bullets
|
100
|
75
| |
6 standard bullets
|
60
|
45
| |
Medical hypo
|
30
|
20
| |
Disposable maintenance tool
|
-
|
45
|
M2
Location: science sector, near R&D entrance
Contains:
|
normal
|
hacked
|
|
Bag of chips
|
3
|
-
| |
6 standard bullets
|
60
|
45
| |
Psi hypo
|
75
|
50
| |
Anti-toxin hypo
|
35
|
25
| |
Anti-radiation hypo
|
-
|
25
|
M3
Location: medical sector, crew lounge, upper level
Contains:
|
normal
|
hacked
|
|
Bottle of juice
|
4
|
-
| |
Disposable maintenance tool
|
60
|
45
| |
Version 1 hacking software
|
35
|
25
| |
Anti-radiation hypo
|
35
|
25
| |
Anti-toxin hypo
|
-
|
25
|
M4
Location: medical sector, bar near crew lounge
Contains:
|
normal
|
hacked
|
|
Cigarettes
|
5
|
-
| |
Fragmentation grenade clip
|
100
|
75
| |
Psi hypo
|
75
|
50
| |
Rifled slugs
|
80
|
60
| |
Version 1 research software
|
-
|
25
|
Deck 3: Hydroponics
H1
Location: sector C, opposite a plantbed, near QBR room
Contains:
|
normal
|
hacked
|
|
Bottle of vodka
|
8
|
-
| |
Medical hypo
|
30
|
20
| |
Rifled slugs
|
80
|
60
| |
Version 1 repairing software
|
35
|
25
| |
Version 2 repairing software
|
-
|
95
|
H2 (broken)
Location: sector C, near bulkhead door to sector A
Contains:
|
normal
|
hacked
|
|
Cigarettes
|
5
|
-
| |
Anti-toxin hypo
|
35
|
25
| |
6 standard bullets
|
60
|
45
| |
Version 1 modification software
|
35
|
25
| |
Medical kit
|
-
|
100
|
H3
Location: sector A, near bulkhead door to sector C
Contains:
|
normal
|
hacked
|
|
Mug
|
4
|
-
| |
Anti-toxin hypo
|
35
|
25
| |
Psi hypo
|
75
|
50
| |
Portable battery
|
85
|
65
| |
6 standard bullets
|
-
|
45
|
H4
Location: sector D, second room
Contains:
|
normal
|
hacked
|
|
Cigarettes
|
5
|
-
| |
Fragmentation grenade clip
|
100
|
75
| |
Disposable maintenance tool
|
60
|
45
| |
Psi hypo
|
75
|
50
| |
Incendiary grenade clip
|
-
|
100
|
H5 (destroyed)
Location: sector C, small office near recharger
Contains: nothing
Deck 4: Operations
O1
Location: sector C, outside crew lounge
Contains:
|
normal
|
hacked
|
|
Mug
|
4
|
-
| |
Psi hypo
|
75
|
50
| |
Strength booster
|
50
|
35
| |
Medical hypo
|
30
|
20
| |
Medical kit
|
-
|
100
|
O2
Location: sector C, crew lounge
Contains:
|
normal
|
hacked
|
|
Bottle of vodka
|
8
|
-
| |
Disposable maintenance tool
|
60
|
45
| |
Anti-personnell shotgun shells
|
90
|
70
| |
Proximity grenade clip
|
110
|
80
| |
Version 2 repair software
|
-
|
95
|
O3 (broken)
Location: sector B, between two crew areas
Contains:
|
normal
|
hacked
|
|
Cigarettes
|
5
|
-
| |
6 Armor-piercing bullets
|
120
|
90
| |
6 standard bullets
|
60
|
45
| |
Fragmentation grenade clip
|
100
|
75
| |
EMP grenade clip
|
-
|
100
|
O4
Location: sector D, near armoury & QBR machine
Contains:
|
normal
|
hacked
|
|
Cigarettes
|
5
|
-
| |
Bottle of juice
|
4
|
-
| |
Rifled slugs
|
80
|
60
| |
Psi hypo
|
75
|
40
| |
6 Anti-personnel bullets
|
-
|
90
| |
Recycler
|
-
|
75
|
Deck 5: Recreational
R1
Location: sector A, near gym entrance
Contains:
|
normal
|
hacked
|
|
Soda can
|
3
|
-
| |
6 Anti-personnel bullets
|
120
|
90
| |
Anti-toxin hypo
|
35
|
25
| |
10 prisms
|
120
|
90
| |
Rifled slugs
|
-
|
60
|
R2
Location: sector C, movie theatre lobby
Contains:
|
normal
|
hacked
|
|
Bag of chips
|
900
|
800
| |
Cigarettes
|
950
|
825
| |
Soda Can
|
925
|
850
|
R3
Location: sector C, erotica club
Contains:
|
normal
|
hacked
|
|
Sim-love access card: Nikki
|
225
|
125
| |
Sim-love access card: Candy
|
200
|
100
| |
Sim-love access card: Sven
|
210
|
75
| |
Sim-love access card: Lance
|
200
|
85
|
R4
Location: sector C, top mall floor, near gravshafts
Contains:
|
normal
|
hacked
|
|
Cigarettes
|
5
|
-
| |
Fragmentation grenade clip
|
100
|
75
| |
Medical hypo
|
30
|
20
| |
Psi hypo
|
75
|
50
| |
Medical kit
|
-
|
100
|
R5
Location: sector C, top mall floor, near R4
Contains:
|
normal
|
hacked
|
|
Soda can
|
3
|
-
| |
Disposable maintenance tool
|
60
|
45
| |
10 prisms
|
120
|
90
| |
Anti-toxin hypo
|
30
|
25
| |
Recycler
|
-
|
75
|
R6 (broken)
Location: sector B, pool room
Contains:
|
normal
|
hacked
|
|
Bag of chips
|
3
|
-
| |
6 Armor-piercing bullets
|
120
|
90
| |
Anti-toxin hypo
|
35
|
25
| |
Psi hypo
|
75
|
50
| |
Incendiary grenade clip
|
-
|
100
|
R7 (destroyed)
Location: sector C mall, lower level
Contains: nothing
R8 (destroyed)
Location: sector C mall, upper level
Contains: nothing
R9 (destroyed)
Location: sector C mall, upper level
Contains: nothing
Deck 6: Command
C1
Location: sector A, Tram lobby
Contains:
|
normal
|
hacked
|
|
Bottle of vodka
|
8
|
-
| |
Psi hypo
|
75
|
50
| |
Anti-toxin hypo
|
35
|
25
| |
6 standard bullets
|
60
|
45
| |
6 Armor-piercing bullets
|
-
|
90
|
C2 (broken)
Location: sector B, large Tram lobby
Contains:
|
normal
|
hacked
|
|
Bottle of vodka
|
8
|
-
| |
Proximity grenade clip
|
110
|
80
| |
Recycler
|
100
|
75
| |
10 prisms
|
120
|
90
| |
Medical kit
|
-
|
100
|
C3
Location: sector B, over the officers' quarters
Contains:
|
normal
|
hacked
|
|
Bottle of vodka
|
8
|
-
| |
Psi hypo
|
75
|
50
| |
Anti-personnell shotgun shells
|
90
|
70
| |
Rifled slugs
|
80
|
60
| |
Version 3 repair software
|
-
|
170
|
C4
Location: sector A, Shuttle control
Contains:
|
normal
|
hacked
|
special
|
|
Bottle of vodka
|
8
|
-
|
-
| |
Incendiary grenade clip
|
130
|
100
|
100
| |
Fragmentation grenade clip
|
100
|
75
|
75
| |
Disposable maintenance tool
|
60
|
45
|
45
| |
EMP grenade clip
|
-
|
100
|
-
| |
Sympathetic Resonator
|
-
|
-
|
100
|
C5 (destroyed)
Location: sector A, Tram lobby
Contains: nothing
Rickenbacker
RB1
Location: pod 1, QBR machine room
Contains:
|
normal
|
hacked
|
|
Bag of chips
|
3
|
-
| |
Psi hypo
|
75
|
50
| |
Medical kit
|
130
|
100
| |
10 prisms
|
120
|
90
| |
20 prisms
|
-
|
150
|
RB2
Location: pod 1, near torpedo room
Contains:
|
normal
|
hacked
|
|
Bottle of vodka
|
8
|
-
| |
10 prisms
|
120
|
90
| |
Anti-toxin hypo
|
35
|
25
| |
ExperTech Implant
|
150
|
120
| |
Disruption grenade clip
|
-
|
80
|
RB3 (broken)
Location: bridge, near captain's quarters
Contains:
|
normal
|
hacked
|
|
Bottle of juice
|
4
|
-
| |
Disposable maintenance tool
|
60
|
45
| |
Psi hypo
|
75
|
50
| |
EMP grenade clip
|
130
|
100
| |
20 prisms
|
-
|
150
|
Body Of The Many
B1
Location: first Rickenbacker section to the right
Contains:
|
normal
|
hacked
|
|
Bottle of juice
|
4
|
-
| |
Anti-toxin hypo
|
35
|
25
| |
Psi hypo
|
75
|
50
| |
Medical kit
|
130
|
100
| |
Proximity grenade clip
|
-
|
80
|
B2
Location: large Rickenbacker section in watery area
Contains:
|
normal
|
hacked
|
|
Bag of chips
|
3
|
-
| |
Anti-toxin hypo
|
35
|
25
| |
Anti-personnell shotgun shells
|
90
|
70
| |
10 prisms
|
120
|
-
| |
20 prisms
|
-
|
150
| |
6 Anti-personnel bullets
|
-
|
90
|
Go back to the top of this page
Maps
Go back to the top of this page
Chemical Manifest
| Eng | Med | Hyd | Ops | Rec | Com | RB | BotM |
| As | | | 1 | 2 | | 2 | | 1 |
| Ba | 2 | 1 | 1 | 2 | | 2 | 2 | 2 |
| Cf | 2 | 2 | | | | | | 1 |
| Cs | 1 | | 2 | 2 | 2 | 2 | | 2 |
| Cu | | | 1 | 2 | 2 | | 1 | 1 |
| Fm | | 2 | 1 | 1 | | | | 1 |
| Ga | | 1 | 2 | | 1 | | | 1 |
| Hs | | | 1 | 1 | 2 | 2 | 1 | 3 |
| Ir | 2 | 2 | 2 | 2 | 2 | | 1 | 1 |
| Mo | | | | | 2 | 2 | 2 | 1 |
| Na | | | | 2 | | | | 1 |
| Os | 1 | 1 | | | | | | 1 |
| Ra | | | 1 | 1 | | 2 | 3 | 3 |
| Sb | 2 | 2 | 2 | | 2 | | | 1 |
| Se | | | | | | 2 | 2 | 3 |
| Tc | 1 | 1 | 2 | | | 3 | 2 | 1 |
| Te | 1 | 2 | 2 | | 2 | 1 | 1 | 4 |
| V | 2 | | 1 | | 2 | | | 1 |
| Y | 2 | 2 | | 1 | 1 | | 1 | 3 |
Go back to the top of this page
Copyright © 2000 Jonas H-son (Gray)
Last update: 2006-09-03
|
|
 |


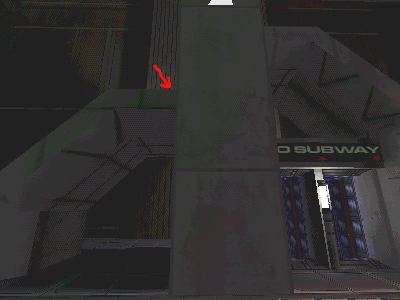
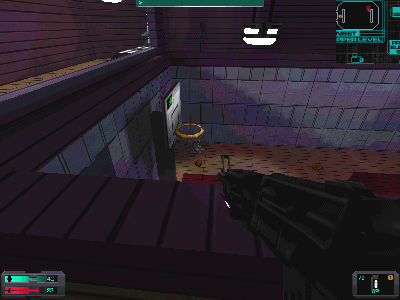
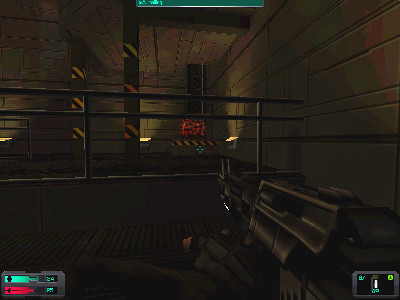
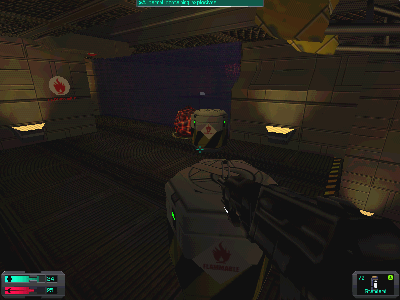
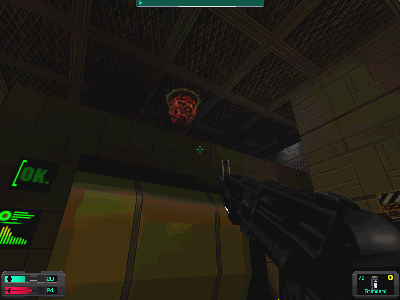
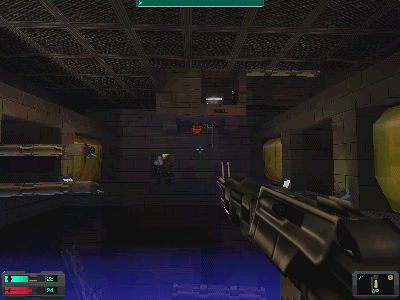
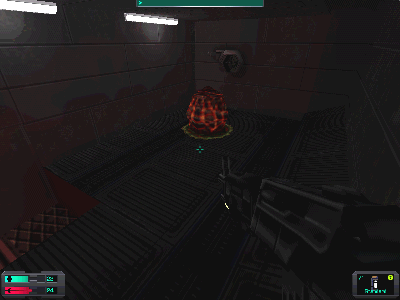
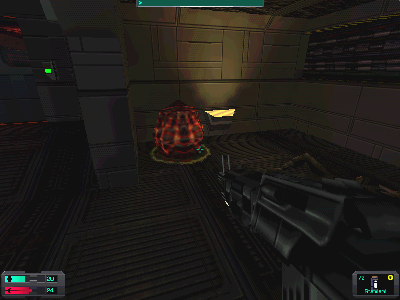
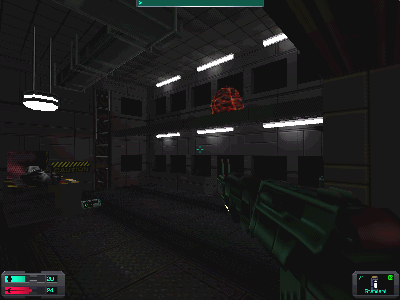
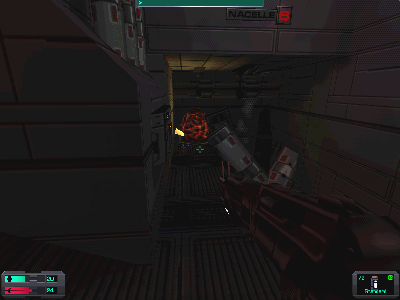
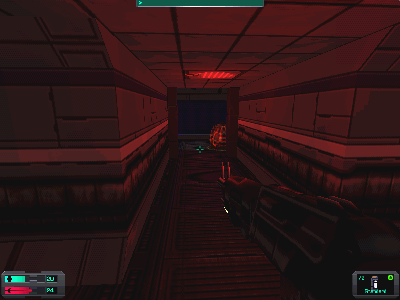
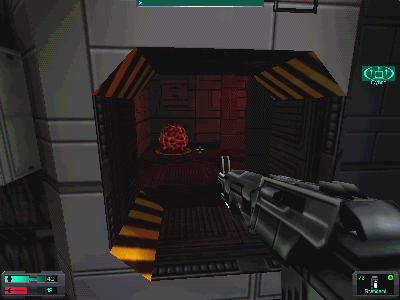
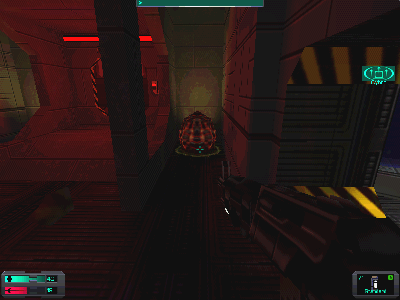
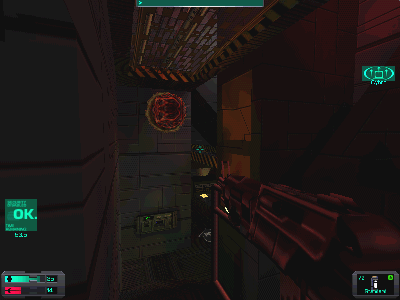
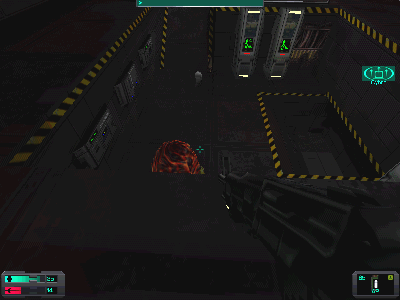
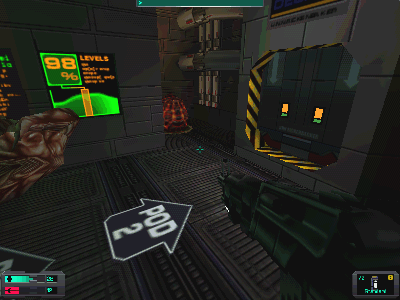
